<?xml version="1.0" encoding="utf-8"?><feed xmlns="http://www.w3.org/2005/Atom" ><generator uri="https://jekyllrb.com/" version="3.10.0">Jekyll</generator><link href="https://www.clearevo.com/feed.xml" rel="self" type="application/atom+xml" /><link href="https://www.clearevo.com/" rel="alternate" type="text/html" /><updated>2026-01-29T02:27:42+00:00</updated><id>https://www.clearevo.com/feed.xml</id><title type="html">ClearEvo.com</title><subtitle></subtitle><author><name>Kasidit Yusuf</name><email>ykasidit@gmail.com</email><uri>https://www.clearevo.com</uri></author><entry><title type="html">When I choose Rust?</title><link href="https://www.clearevo.com/blog/2026/01/29/when_i_choose_rust/" rel="alternate" type="text/html" title="When I choose Rust?" /><published>2026-01-29T00:00:00+00:00</published><updated>2026-01-29T00:00:00+00:00</updated><id>https://www.clearevo.com/blog/2026/01/29/when_i_choose_rust</id><content type="html" xml:base="https://www.clearevo.com/blog/2026/01/29/when_i_choose_rust/"><![CDATA[<p>When a module needs safety from runtime race conditions and random ‘not thread safe’ issues - prevented at build time by the compiler - this is where rust really stands out for me, and all who work on it went through <a href="https://doc.rust-lang.org/book/">the book</a> instead of pasting (or sending) what one doesn’t understand and therefore can’t fix it when issues happen.</p>]]></content><author><name>Kasidit Yusuf</name><email>ykasidit@gmail.com</email><uri>https://www.clearevo.com</uri></author><category term="programming" /><summary type="html"><![CDATA[When a module needs safety from runtime race conditions and random ‘not thread safe’ issues - prevented at build time by the compiler - this is where rust really stands out for me, and all who work on it went through the book instead of pasting (or sending) what one doesn’t understand and therefore can’t fix it when issues happen.]]></summary></entry><entry><title type="html">Hikvsion EasyLink WIFI camera not blinking blue fix</title><link href="https://www.clearevo.com/blog/2025/11/17/hikvsion_easylink_wifi_camera_not_blinking_blue_fix/" rel="alternate" type="text/html" title="Hikvsion EasyLink WIFI camera not blinking blue fix" /><published>2025-11-17T00:00:00+00:00</published><updated>2025-11-17T00:00:00+00:00</updated><id>https://www.clearevo.com/blog/2025/11/17/hikvsion_easylink_wifi_camera_not_blinking_blue_fix</id><content type="html" xml:base="https://www.clearevo.com/blog/2025/11/17/hikvsion_easylink_wifi_camera_not_blinking_blue_fix/"><![CDATA[<p>The kit came with 4 cameras but, following the instructtions, only two auto-linked with wifi dvr device in the kit, the other two always blinked red.</p>

<p>Searched around, some said to remove the face case to press and hold the reset button but for my camera there was no case to remove but there was a small cover what a gear icon saying ‘SETTINGS’ under it:
<img src="/images/hikvision_wifi_camera_reset_button_under_this_panel.jpg" alt="(hikvision_wifi_camera_reset_button_under_this_panel" /></p>

<p>It can be removed with a phillips screwdriver then we can long press the small floating button/lever on the right of where it says ‘RESET’. Then the cam would say something like reset success and shortly it will finally find the wifi dvr and blink blue, where you can finally see and add the device normally in the app.
<img src="/images/hikvision_wifi_camera_reset_button.jpg" alt="hikvision_wifi_camera_reset_button" /></p>]]></content><author><name>Kasidit Yusuf</name><email>ykasidit@gmail.com</email><uri>https://www.clearevo.com</uri></author><category term="howto" /><summary type="html"><![CDATA[The kit came with 4 cameras but, following the instructtions, only two auto-linked with wifi dvr device in the kit, the other two always blinked red.]]></summary></entry><entry><title type="html">Flash Samsung firmwares on Gnu/Linux</title><link href="https://www.clearevo.com/blog/2025/11/10/flash_samsung_firmwares_with_gnu_linux_odin/" rel="alternate" type="text/html" title="Flash Samsung firmwares on Gnu/Linux" /><published>2025-11-10T00:00:00+00:00</published><updated>2025-11-10T00:00:00+00:00</updated><id>https://www.clearevo.com/blog/2025/11/10/flash_samsung_firmwares_with_gnu_linux_odin</id><content type="html" xml:base="https://www.clearevo.com/blog/2025/11/10/flash_samsung_firmwares_with_gnu_linux_odin/"><![CDATA[<p>I wanted to upgrade a firmware of a Samsung S24 Plus to Android 16 from my GNU/Linux system but was too lazy to the old way of installing VirtualBox with Windows, then Odin in there.</p>

<p>Searched around, found this: <a href="https://github.com/Adrilaw/OdinV4">OdinV4 for Linux</a> - worked like a charm! Full credits to the authors of the project, please star their project!</p>

<p>Just make sure you put all the files you get from samfirmware in their respective param/arguments to the odin binary - I wasnt sure which arg for the <code class="language-plaintext highlighter-rouge">HOME_CSC_OXM_S926BOXMACYJ7_MQB102650869_REV00_user_low_ship_MULTI_CERT.tar.md5</code> file but tried <code class="language-plaintext highlighter-rouge">-u</code> and it worked and now phone is working fine with android 16.</p>]]></content><author><name>Kasidit Yusuf</name><email>ykasidit@gmail.com</email><uri>https://www.clearevo.com</uri></author><category term="programming" /><summary type="html"><![CDATA[I wanted to upgrade a firmware of a Samsung S24 Plus to Android 16 from my GNU/Linux system but was too lazy to the old way of installing VirtualBox with Windows, then Odin in there.]]></summary></entry><entry><title type="html">Markdown a website with Jekyll Academic Pages</title><link href="https://www.clearevo.com/blog/2025/11/07/markdown_static_website_and_blog_with_jekyll_academic_pages/" rel="alternate" type="text/html" title="Markdown a website with Jekyll Academic Pages" /><published>2025-11-07T00:00:00+00:00</published><updated>2025-11-07T00:00:00+00:00</updated><id>https://www.clearevo.com/blog/2025/11/07/markdown_static_website_and_blog_with_jekyll_academic_pages</id><content type="html" xml:base="https://www.clearevo.com/blog/2025/11/07/markdown_static_website_and_blog_with_jekyll_academic_pages/"><![CDATA[<p><img src="/blog/images/image.png" alt="edit markdown on phone" /></p>

<p>Having used Nanoc and Jekyll for probably a decade, I was looking for easy ways to put stuff from phone without a computer while being a static website. I was amazed to find out how easy it was to make any website via github pages (that you can link to your domain name) free and simple just by forking via the instructions described in <a href="https://github.com/academicpages/academicpages.github.io">Academic Pages github repo’s readme</a> - without a computer just through a phone nowadays, the pre-configured github actions handle the auto build so seamless! Really recommended.</p>

<p>Of course, since I had to migrate old posts/data, I had to use my computer (with Emacs of course) to edit and migrate old stuff.</p>

<p>The integrated github pages/actions/defaults/examples made a very good base to start from.</p>

<p>Truly appreciate and would like to hereby thank all the authors of academic pages and jekyll for their outstanding work!</p>]]></content><author><name>Kasidit Yusuf</name><email>ykasidit@gmail.com</email><uri>https://www.clearevo.com</uri></author><category term="programming" /><summary type="html"><![CDATA[]]></summary></entry><entry><title type="html">Testing Python projects with commands like make -j4</title><link href="https://www.clearevo.com/blog/2020/04/23/testing_python_projects_with_commands_like_make_-j4/" rel="alternate" type="text/html" title="Testing Python projects with commands like make -j4" /><published>2020-04-23T00:00:00+00:00</published><updated>2020-04-23T00:00:00+00:00</updated><id>https://www.clearevo.com/blog/2020/04/23/testing_python_projects_with_commands_like_make_-j4</id><content type="html" xml:base="https://www.clearevo.com/blog/2020/04/23/testing_python_projects_with_commands_like_make_-j4/"><![CDATA[<p><img src="/blog/images/test_python_with_make.png" alt="test python with GNU Make" /></p>

<p>Having used pytest, nose, nose2 for many months and faced random issues like some tests would fail when running in a set (not concurrently) together with all other tests but pass if ran alone (whereas the target use case was to be run in its own process alone), and also random issues in getting tests to continue from the last failed one (in larger projects with 300+ integration tests) - I was looking for a solution that can run tests concurrently, in their own processes, and can continue from the last failed (not having to start again from the first test). Tried pytest, nose, nose2 but they dont seem to fit this need although one of them had a continue from last failed feature but randomly it would start all again..</p>

<p>
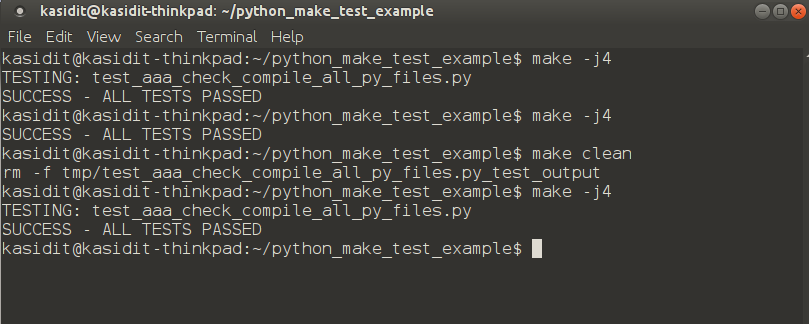
What if we can use the tried in true ‘GNU Make’ as used in most C projects like the Linux kernel sources to run python tests? It can run concurrently like <code class="language-plaintext highlighter-rouge">make -j4</code>, it continues from last failed just by running <code class="language-plaintext highlighter-rouge">make</code>, start over with <code class="language-plaintext highlighter-rouge">make clean</code> then <code class="language-plaintext highlighter-rouge">make</code> - yes it worked perfectly for my needs! Just make sure you handle <code class="language-plaintext highlighter-rouge">__main__</code> to run your test function in each <code class="language-plaintext highlighter-rouge">test_&lt;test name&gt;.py</code> file so that each test could be run with <code class="language-plaintext highlighter-rouge">python test_&lt;test name&gt;.py</code>.</p>

<p>To use this, just use copy this Makefile from my github repo into your python project folder then run <code class="language-plaintext highlighter-rouge">make</code>: <a href="https://github.com/ykasidit/python_make_test_example/blob/master/Makefile">https://github.com/ykasidit/python_make_test_example/blob/master/Makefile</a></p>]]></content><author><name>Kasidit Yusuf</name><email>ykasidit@gmail.com</email><uri>https://www.clearevo.com</uri></author><category term="programming" /><summary type="html"><![CDATA[]]></summary></entry><entry><title type="html">How to connect the Ardusimple ublox F9 board to u-center in Windows 7</title><link href="https://www.clearevo.com/blog/2020/01/02/how_to_connect_the_ardusimple_ublox_f9_board_to_u-center_in_windows_7/" rel="alternate" type="text/html" title="How to connect the Ardusimple ublox F9 board to u-center in Windows 7" /><published>2020-01-02T00:00:00+00:00</published><updated>2020-01-02T00:00:00+00:00</updated><id>https://www.clearevo.com/blog/2020/01/02/how_to_connect_the_ardusimple_ublox_f9_board_to_u-center_in_windows_7</id><content type="html" xml:base="https://www.clearevo.com/blog/2020/01/02/how_to_connect_the_ardusimple_ublox_f9_board_to_u-center_in_windows_7/"><![CDATA[<p>Thanks to our friend Geoff from Australia for sharing this tip of using the Ardusimple SimplRTK2B board with U-Blox U-Center program on Windows 7 PC (normally it works only with Windows 10). The trick is the power the board first via the ‘power+xbee’ usb port then connect to the main ‘power+gps’ usb port and disconnect the first one - this is shown in below video:</p>

<iframe width="560" height="315" src="https://www.youtube.com/embed/dZ2H5XP8gJ4" frameborder="0" allow="accelerometer; autoplay; encrypted-media; gyroscope; picture-in-picture" allowfullscreen=""></iframe>]]></content><author><name>Kasidit Yusuf</name><email>ykasidit@gmail.com</email><uri>https://www.clearevo.com</uri></author><category term="howto" /><summary type="html"><![CDATA[Thanks to our friend Geoff from Australia for sharing this tip of using the Ardusimple SimplRTK2B board with U-Blox U-Center program on Windows 7 PC (normally it works only with Windows 10). The trick is the power the board first via the ‘power+xbee’ usb port then connect to the main ‘power+gps’ usb port and disconnect the first one - this is shown in below video:]]></summary></entry><entry><title type="html">How to use Bluetooth Xbee Module on ardusimple ublox F9 UART1 with UBX message support instead of UART2</title><link href="https://www.clearevo.com/blog/2020/01/02/how_to_use_bluetooth_xbee_module_on_ardusimple_ublox_f9_uart1_with_ubx_message_support_instead_of_uart2/" rel="alternate" type="text/html" title="How to use Bluetooth Xbee Module on ardusimple ublox F9 UART1 with UBX message support instead of UART2" /><published>2020-01-02T00:00:00+00:00</published><updated>2020-01-02T00:00:00+00:00</updated><id>https://www.clearevo.com/blog/2020/01/02/how_to_use_bluetooth_xbee_module_on_ardusimple_ublox_f9_uart1_with_ubx_message_support_instead_of_uart2</id><content type="html" xml:base="https://www.clearevo.com/blog/2020/01/02/how_to_use_bluetooth_xbee_module_on_ardusimple_ublox_f9_uart1_with_ubx_message_support_instead_of_uart2/"><![CDATA[<p>Normally the SimpleRTK2B board’s XBee mount point only supports UART2 which doesn’t support UBX messages, below video shows how to map UART1 to UART2 and thus using UART1 on the XBee port:</p>

<iframe width="560" height="315" src="https://www.youtube.com/embed/rFpKoT-v3Kg" frameborder="0" allow="accelerometer; autoplay; encrypted-media; gyroscope; picture-in-picture" allowfullscreen=""></iframe>

<p>Finally, below video shows above config in action:</p>

<iframe width="560" height="315" src="https://www.youtube.com/embed/VgdNPssRcjA" frameborder="0" allow="accelerometer; autoplay; encrypted-media; gyroscope; picture-in-picture" allowfullscreen=""></iframe>]]></content><author><name>Kasidit Yusuf</name><email>ykasidit@gmail.com</email><uri>https://www.clearevo.com</uri></author><category term="howto" /><summary type="html"><![CDATA[Normally the SimpleRTK2B board’s XBee mount point only supports UART2 which doesn’t support UBX messages, below video shows how to map UART1 to UART2 and thus using UART1 on the XBee port:]]></summary></entry><entry><title type="html">Android NDK Get IMSI from C code</title><link href="https://www.clearevo.com/blog/2013/06/26/android_ndk_get_imsi/" rel="alternate" type="text/html" title="Android NDK Get IMSI from C code" /><published>2013-06-26T00:00:00+00:00</published><updated>2013-06-26T00:00:00+00:00</updated><id>https://www.clearevo.com/blog/2013/06/26/android_ndk_get_imsi</id><content type="html" xml:base="https://www.clearevo.com/blog/2013/06/26/android_ndk_get_imsi/"><![CDATA[<p>Although not really “native”, but works well by parsing a command line call instead - credit goes to “Alex P.” for the answer in <a href="http://stackoverflow.com/questions/14813875/how-to-get-imsi-number-in-android-using-command-line">http://stackoverflow.com/questions/14813875/how-to-get-imsi-number-in-android-using-command-line</a> - thanks for the command.</p>

<pre>

char cmd_res_line[256];
char total_cmd_res[25600];


//WARNING! NO HANDLING FOR VERY_LONG COMMAND READS YET
char* exec_get_out(char* cmd) {

    FILE* pipe = popen(cmd, "r");

    if (!pipe) 
      return NULL;

    total_cmd_res[0] = 0;

    while(!feof(pipe)) {
        if(fgets(cmd_res_line, 256, pipe) != NULL)
	  {
	    //TODO: add handling for long command reads...
	    strcat(total_cmd_res,cmd_res_line);
	  }
    }
    pclose(pipe);
    return total_cmd_res;
}

...

char imsi[16];
imsi[15]=0;
char* res = exec_get_out("service call iphonesubinfo 3");  
if (strlen(res)&gt;210) {
	imsi[0] = res[75];
	imsi[1] = res[77];
	imsi[2] = res[79];
	imsi[3] = res[81];
	imsi[4] = res[136];
	imsi[5] = res[138];
	imsi[6] = res[140];
	imsi[7] = res[142];
	imsi[8] = res[144];
	imsi[9] = res[146];
	imsi[10] = res[148];
	imsi[11] = res[150];
	imsi[12] = res[205];
	imsi[13] = res[207];
	imsi[14] = res[209];
	printf("imsi: %s len %d\r\n",imsi,strlen(imsi));
}
</pre>]]></content><author><name>Kasidit Yusuf</name><email>ykasidit@gmail.com</email><uri>https://www.clearevo.com</uri></author><category term="programming" /><summary type="html"><![CDATA[Although not really “native”, but works well by parsing a command line call instead - credit goes to “Alex P.” for the answer in http://stackoverflow.com/questions/14813875/how-to-get-imsi-number-in-android-using-command-line - thanks for the command.]]></summary></entry><entry><title type="html">Android NDK Get IMEI Natively</title><link href="https://www.clearevo.com/blog/2012/11/26/android_ndk_get_imei_natively/" rel="alternate" type="text/html" title="Android NDK Get IMEI Natively" /><published>2012-11-26T00:00:00+00:00</published><updated>2012-11-26T00:00:00+00:00</updated><id>https://www.clearevo.com/blog/2012/11/26/android_ndk_get_imei_natively</id><content type="html" xml:base="https://www.clearevo.com/blog/2012/11/26/android_ndk_get_imei_natively/"><![CDATA[<p><strong>Here’s how you can get the phone’s IMEI directly via (NDK) Native C code:</strong></p>

<p>This code uses 2 methods, should work on most single-sim GSM/WCDMA/LTE phones.</p>

<p>#include &lt;sys/system_properties.h&gt;</p>

<pre>
	//returns the string length of the value.
	int ir = __system_property_get("ro.gsm.imei", imei_start);           
	
      if(ir &gt; 0)
	{
	  imei_start[15]=0;//strz end      
	  printf("method1 got imei %s len %d\r\n",imei_start,strlen(imei_start));
	  strcpy(g_imei,imei_start);
	}
      else
	{
	  printf("method1 imei failed - trying method2\r\n");
	  //old dumpsys imei getter
	  char* res = exec_get_out("dumpsys iphonesubinfo");  
	  const char* imei_start_match = "ID = ";
	  int imei_start_match_len = strlen(imei_start_match);
	  char* imei_start = strstr(res,imei_start_match);
	  if(imei_start &amp;&amp; strlen(imei_start)&gt;=15+imei_start_match_len)
	    {
	      imei_start += imei_start_match_len;
	      imei_start[15] = 0;
	      printf("method2 IMEI [%s] len %d\r\n",imei_start,strlen(imei_start));
	      strcpy(g_imei,imei_start);
	    }
	}      
</pre>]]></content><author><name>Kasidit Yusuf</name><email>ykasidit@gmail.com</email><uri>https://www.clearevo.com</uri></author><category term="programming" /><summary type="html"><![CDATA[Here’s how you can get the phone’s IMEI directly via (NDK) Native C code:]]></summary></entry><entry><title type="html">Android force WCDMA or GSM or AUTO from shell</title><link href="https://www.clearevo.com/blog/2012/10/10/android_force_wcdma_or_gsm_or_auto_from_shell/" rel="alternate" type="text/html" title="Android force WCDMA or GSM or AUTO from shell" /><published>2012-10-10T00:00:00+00:00</published><updated>2012-10-10T00:00:00+00:00</updated><id>https://www.clearevo.com/blog/2012/10/10/android_force_wcdma_or_gsm_or_auto_from_shell</id><content type="html" xml:base="https://www.clearevo.com/blog/2012/10/10/android_force_wcdma_or_gsm_or_auto_from_shell/"><![CDATA[<p>This requires a rooted phone - tested on HTC OneS (Thailand) and OneX (AT&amp;T - USA).</p>

<p>Simply open an <em>adb shell</em> and enter:</p>

<ol>
  <li>
    <pre>
./sqlite3 /data/data/com.android.providers.settings/databases/settings.db "update secure set value='2' where name='preferred_network_mode'"
</pre>
  </li>
</ol>
<p>&lt;/pre&gt;</p>

<ol>
  <li>after “su”, &lt;pre&gt;killall com.android.phone&lt;/pre&gt;</li>
</ol>

<p>Done.</p>

<p>The step 1 changes the settings database - but it is not reflected in the settings app or known/reloaded by com.android.phone (which I understand that it does the real forcing…) yet - we can reboot but that takes too long and unneccesary - I found that killing the process of com.android.phone would cause some watchdog to re-start it (step 2) - and re-load our new settings into effect (probably by calling <em>setpreferrednetworktype</em> with our new values - I think we can’t call that internal java function directly due to signature/key restrictions).</p>

<p>I’d like to try to find some time to make an app to do/automate this - it helps rooted phones with special firmwares have that missing option to force directly - very beneficial for programmatical/automated forcing - this is an alternative to the manual/GUI method using the <em>#</em>#4636#<em>#</em> &gt; phone info &gt; Setpreferred network type method.</p>]]></content><author><name>Kasidit Yusuf</name><email>ykasidit@gmail.com</email><uri>https://www.clearevo.com</uri></author><category term="howto" /><summary type="html"><![CDATA[This requires a rooted phone - tested on HTC OneS (Thailand) and OneX (AT&amp;T - USA).]]></summary></entry></feed>